Building a Batting Cage is every baseball parent’s dream project. It’s a place where your child can practice anytime, sharpen their skills, and grow their love for the game. But before you dive in, there are some critical things to keep in mind. You need to
understand the seriousness of the task that you are taking up. Many eager parents jump into this project without the right knowledge and end up facing issues that could have been avoided. In this blog post, we’ll walk you through ten common mistakes people make when building a backyard batting cage and how you can steer clear of them. We are assuming that you already know the basics and
understand Backyard Batting Cages 101. By the end, you’ll be equipped with the know-how to create a batting cage that not only serves its purpose but lasts for years to come.
1. Never Go Cheap: Invest in High-Quality Materials and Accessories
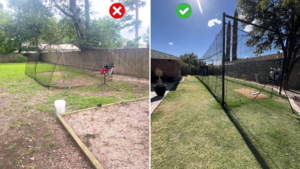
What Can Go Wrong: The saying “you get what you pay for” holds true when it comes to batting cages. Cutting corners with cheap materials might save you money upfront, but it could cost you more in the long run. Low-quality nets can tear easily, frames may rust or break, and accessories could fail, leading to additional expenses on replacements and repairs.
How to Avoid It: Choose durable materials from reputable suppliers. Look for nets made from high-density polyethylene (HDPE) or nylon, as they are known for their strength and longevity. A sturdy frame made of galvanized steel or treated wood will withstand the elements better than cheaper alternatives.
Already Made the Mistake?: If you’ve already invested in low-quality materials, consider upgrading key components like the netting or frame. Reinforce weak spots with additional support or use protective coatings to prolong their lifespan.
2. Detect All Possible Ricochets and Build Accordingly

What Can Go Wrong: Ricochets can be dangerous and damaging. A ball bouncing back unexpectedly can cause injuries or damage to property. This is especially a concern in smaller backyard spaces.
How to Avoid It: Plan your cage layout carefully. Ensure that the walls, roof, and corners are adequately covered to prevent balls from escaping. Use thicker netting on the sides where ricochets are more likely, and consider adding padding in areas prone to ball impact.
Already Made the Mistake?: If ricochets are already an issue, add additional layers of netting in the problem areas or install padding to absorb the impact and reduce bounce-backs.
3. Make Sure Your Cage Complies with Standard Dimensions
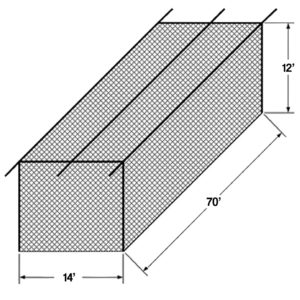
What Can Go Wrong: A batting cage that’s too small or oddly shaped can limit practice effectiveness. Your child won’t get the full benefit of practicing in a space that doesn’t mimic real game conditions.
How to Avoid It: Standard batting cage dimensions are around 70 feet in length, 14 feet in width, and 12 feet in height. While you can adjust these based on your space, ensure the cage is large enough for your child to practice comfortably and realistically.
Already Made the Mistake?: If your cage is too small, see if there’s a way to extend it or adjust its shape to make it more functional. Even small tweaks, like increasing the height, can make a big difference.
4. Always Check with Local Construction Regulations Before Building

What Can Go Wrong: Ignoring local building codes and regulations can lead to fines, forced removals, or even legal issues. Your batting cage might be considered a structure that requires permits or adherence to zoning laws.
How to Avoid It: Before you start building, check with your local government or homeowners’ association to see if there are any rules or permits required for building a batting cage. This could include restrictions on height, proximity to property lines, or material usage.
Already Made the Mistake?: If you’ve already built your cage without checking regulations, you might need to retroactively apply for permits or adjust the structure to comply with local laws.
5. DIY Only If You Can Give Time for Proper Research and Execution or Else Hire an Expert
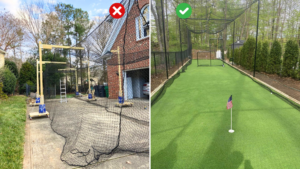
What Can Go Wrong: Building a batting cage is a significant project that requires time, effort, and knowledge. Rushing through it or skipping research can lead to a poorly constructed cage that might not be safe or effective.
How to Avoid It: If you’re committed to DIY, take the time to thoroughly research every aspect of building a batting cage, from materials to construction techniques. Follow detailed plans and don’t hesitate to ask for help if you need it. If you’re short on time or expertise, consider hiring a professional.
Evaluate between DIY or Professional Installation.
Already Made the Mistake?: If your DIY cage isn’t turning out as planned, don’t be afraid to pause and reassess. It’s better to bring in an expert to finish the job right than to end up with a faulty cage.
6. Pop-Up or Portable Cages Have Less Utility Lifecycle and Are Expensive
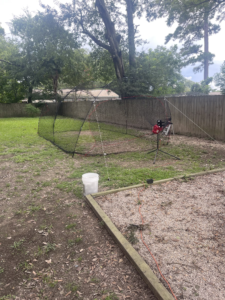
What Can Go Wrong: While pop-up or portable cages are convenient, they are often not as durable or long-lasting as permanent structures. They can also be more expensive in the long run if you have to replace them frequently.
How to Avoid It: Consider your long-term needs. If you plan on using the cage regularly for years to come, investing in a permanent structure may be more cost-effective. However, if you need a temporary solution, choose a high-quality portable cage and take care of it to maximize its lifespan.
Already Made the Mistake?: If you’ve purchased a portable cage and it’s not holding up, consider reinforcing it with additional supports or investing in a permanent cage sooner rather than later.
7. Netting Should Be at Least 36 Twine; 24 Won’t Last That Long
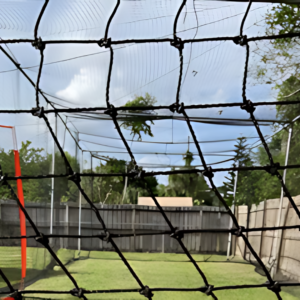
What Can Go Wrong: The netting is one of the most critical components of your batting cage. Using a lower grade like 24 twine can lead to frequent tears and replacements, especially with regular use.
How to Avoid It: Opt for 36 twine or higher for your netting. This will provide better durability and withstand more wear and tear from frequent use.
Already Made the Mistake?: If you’ve installed 24 twine netting, monitor it closely for signs of wear. Be ready to replace it with stronger netting as soon as it starts to show damage.
8. Always Place the Netting 1 ft Inside of the Poles/Frame

What Can Go Wrong: Placing the netting directly against the poles or frame can lead to wear and tear, reducing the lifespan of your netting. Balls hitting the poles can also cause ricochets and damage.
How to Avoid It: Leave at least one foot of space between the netting and the frame. This will allow the netting to absorb the impact of the ball without rubbing against the poles, reducing wear and tear.
Already Made the Mistake?: If your netting is already too close to the frame, consider repositioning it or adding extra padding to the poles to protect both the netting and the frame.
9. Buy Lighting with at Least 7,000 Lumens

What Can Go Wrong: Insufficient lighting can make evening practice sessions difficult or even dangerous. Poor visibility can lead to accidents and make it harder for your child to practice effectively.
How to Avoid It: Invest in high-quality lighting that provides at least 7,000 lumens. This will ensure the batting cage is well-lit and safe for evening practice sessions.
Already Made the Mistake?: If your current lighting isn’t bright enough, consider upgrading to more powerful lights or adding additional fixtures to improve visibility.
10. List Your Cage on CageList to Make a Return on Your Investment
What Can Go Wrong: Building a batting cage is an investment. If you’re not using it all the time, you could be missing out on an opportunity to recoup some of your costs by renting it out to local players.
How to Avoid It: List your batting cage on CageList, a platform where local baseball and softball players can book practice time. This not only helps you make a return on your investment but also builds a sense of community around your batting cage.
Already Made the Mistake?: It’s never too late to list your cage on CageList. Sign up today and start welcoming players to your backyard!
Conclusion
Building a batting cage is a rewarding project, but it requires careful planning and attention to detail. By avoiding these common mistakes, you can ensure your batting cage is safe, durable, and effective for years to come. Whether you’re a seasoned DIYer or just getting started, these tips will help you create the perfect practice space for your budding baseball star. Remember, the key to a successful batting cage is not just in the construction, but in the thought and care you put into every step of the process. So take your time, do it right, and enjoy watching your child’s skills grow in the comfort of your own backyard.


